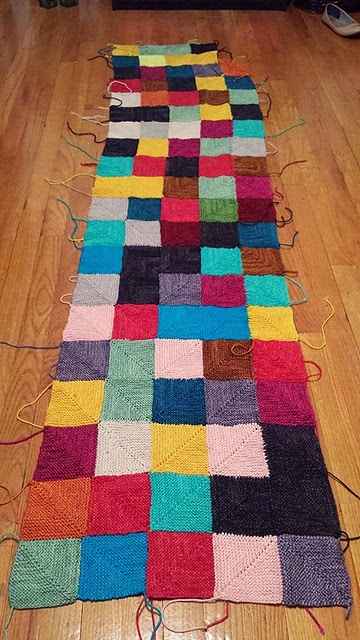
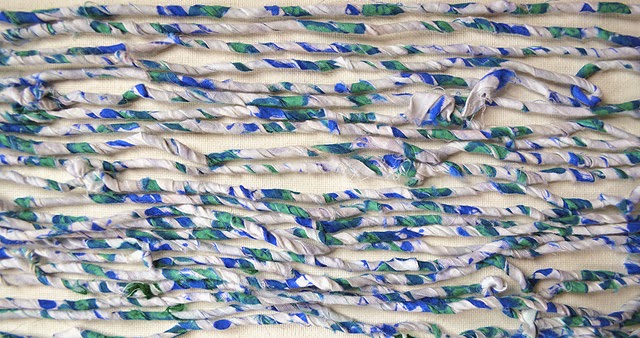
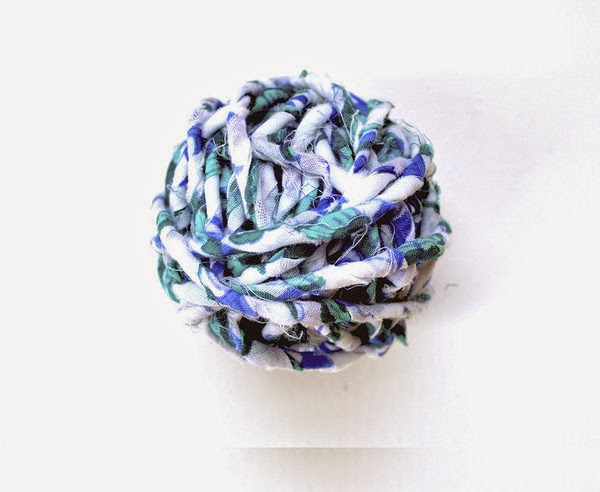
 When I decided on using mitered squares for my mood blanket I didn’t really think about how to connect them and beyond that how to connect the rows together. I just knew I liked the way they looked and that people had been connecting them somehow. So mitered squaring I was. Connecting the first row of squares as I made them was easy. When it came time to start row 2…then the trouble came. I knew I wanted my diagonals to go in the same direction as row 1 so I figured out how to make the first square and quickly realized that square 2 and the rest of the row wouldn’t prove to be as easy. I didn’t want to bother with seaming 2 long rows together so I scoured the interwebs for some kind of solution. I quickly realized that the easiest way to connect mitered squares just happens to be in a diagonal fashion . I certainly wasn’t about to un-knit 21 days of progress so I knew I had to find another answer and find another answer I did! So I figured it was only the nice thing to do to share my answer with anyone else who cares to know. So I took some pictures and I’ll explain my steps. If something doesn’t seem right or you have any questions, just ask!
Note: I’m making my squares with 20 stitches on each side so if you attempt this with a different sized square, adjust your numbers accordingly.
I’ll be referring to 3 different squares to work with:
-The Previous Square-the square in the same row as your new square: Pink
-The New Square-the square you’re knitting: Yellow
-The Top Row Square-the square in the row above your new square: Blue
Let’s go!
Step 1:
 |
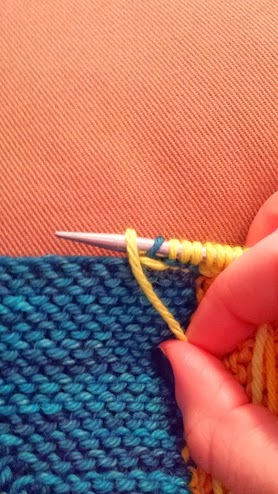
| (RS) |
With a spare needle (I used a smaller one than my squares are made with-a US5), pick up 20 stitches from the right side of the Previous Square(pink), starting at the bottom of the square
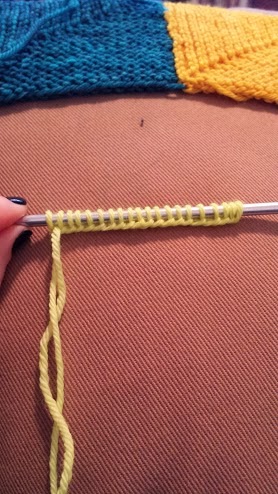
Step 2:
With the proper needle-US7, cast on 20 stitches with the yarn your New Square(yellow) will be made in
Step 3:
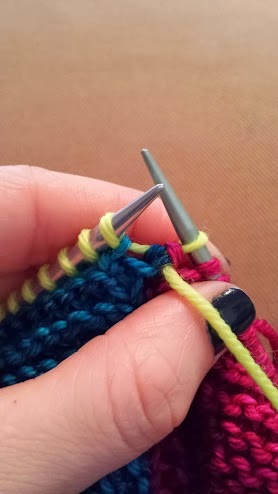
I found it easiest to achieve this step by placing the Top Row Square(blue) right side down, so the bottom edge is on top.
 |
| (WS) |
With the needle you just cast stitches onto, pick up a stitch from the right side corner of the bottom edge of the Top Row Square. Having the New Square yarn in front, wrap it on top of your needle(back to front)
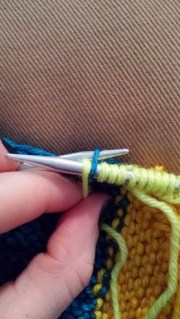 |
| (WS) |
Using your free needle-US7, slip your Top Row Square stitch over your New Square yarn, from the back
 |
| (WS) |
Repeat this step, picking up 20 stitches altogether. You should now have 40 stitches on your needle with your New Square yarn
Step 4:
To begin this step, turn your work over so the Previous Square is to the right of your cast on stitches.
 |
| (RS) |
Slip the first stitch from the New Square onto the needle holding the Previous Square stitches
 |
| (RS) |
With the New Square yarn in front, slip the Previous Square stitch over the New Square stitch from behind and slip your New Square stitch back onto its needle.
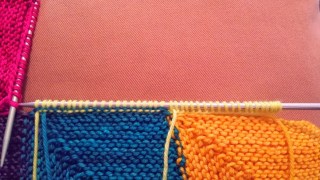
Knit the next row, then continue making your miter square making sure to repeat Step 4 every time you finish the row ending next to the Previous Square.
 |
| (RS) |
As your miter square decreases to the corner the number of stitches from the Previous Square should lessen evenly until you finish the corner.
 |
| (RS) |
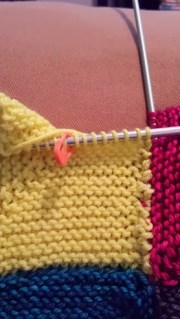
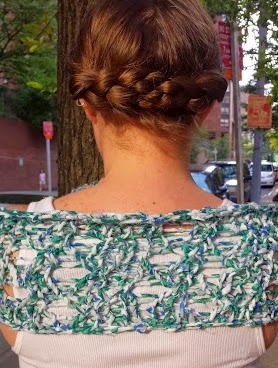
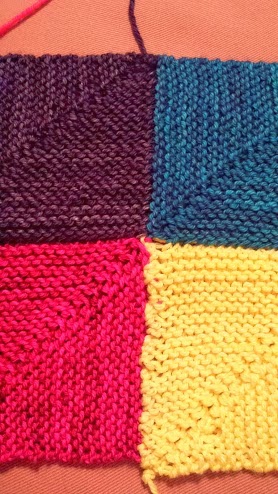
It should end up looking like this!! It’s not quite as smooth as the top row but I have every faith that it will block out nicely….and that I won’t mind it too badly even if it doesn’t!
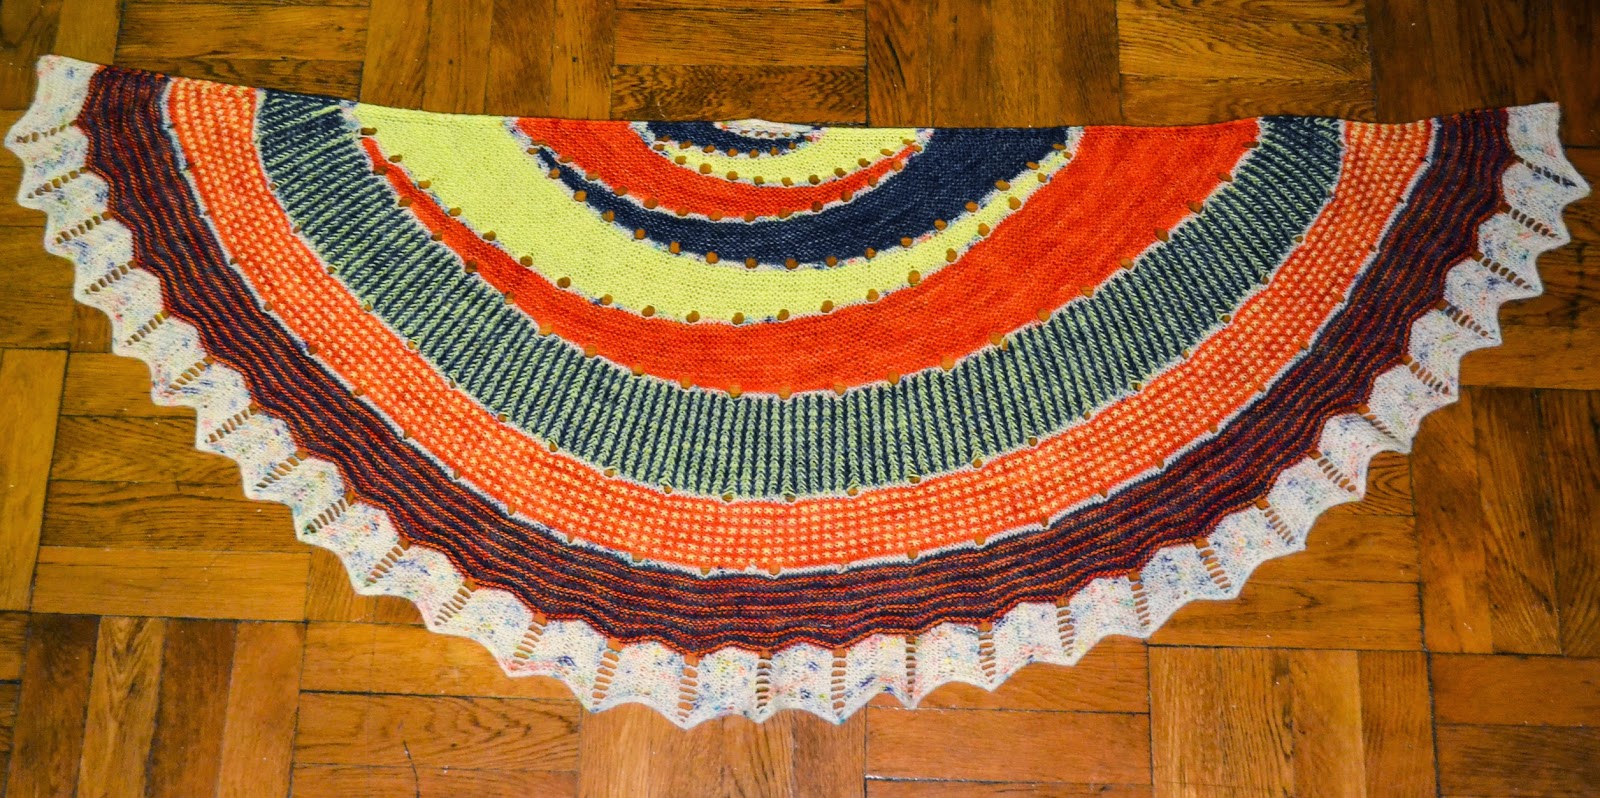
Now that that’s settled I’m also glad to announce that I’m officially caught up on my mood days! It’s such a relief and I’m really happy with the way it’s coming out. Needless to say, 2014 will certainly be colorful!


